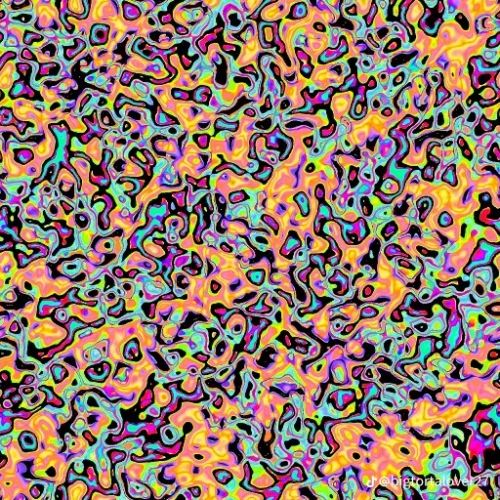
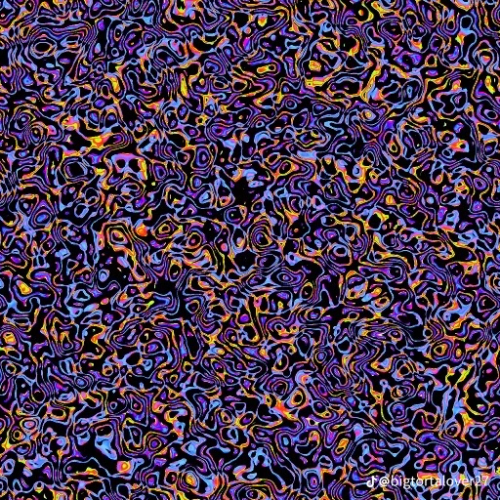
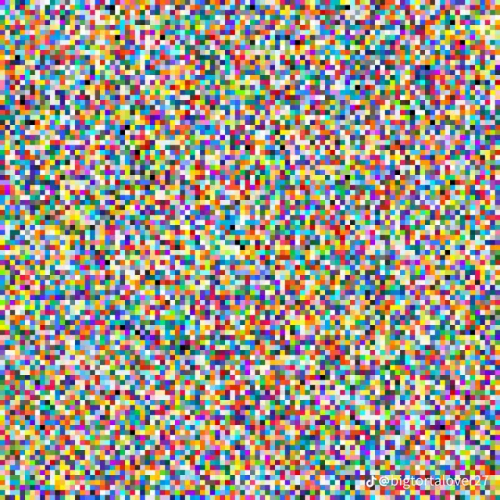
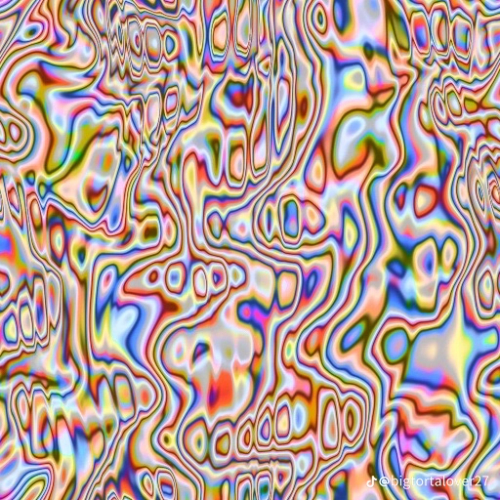
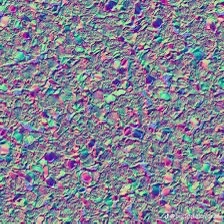
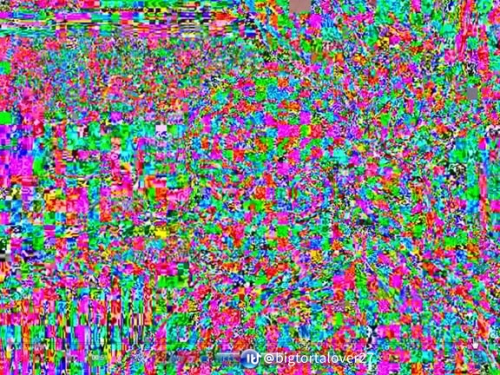
AI Disturbance Overlays For Those Who Don't Have Ibis Paint Premium. Found Them On Tiktok
AI disturbance overlays for those who don't have Ibis paint premium. found them on tiktok
More Posts from Basket-of-references and Others
Heres a MEGA folder filled with art book pdfs, if anyone has some others that you'd like me to add to it thats missing, please let me know and send me the link
EDIT 1: If you're a bit new to art and you're super overwhelmed by the options and you don't know where to start, I highly recommend the morpho series of books
Edit 2:No more Google Drive, just the MEGA folder now, so don't panic if the stuff on Google ain't there no more, its still up, just in a different location
Digital Painting: tips for beginners
Heyo! I got asked if I could make a tutorial on digital painting so I’m gonna throw together some advice meant for people who are starting out and want to figure out exactly how this stuff all works. Because it’s hard! What I hope to accomplish here is to make painting more approachable for you.
Firstly, I have put together something like this before, so for archival purposes here it is: http://holy-quinity.tumblr.com/post/89594801811/i-dont-know-how-much-of-this-kind-of-thing-you
For those of you who don’t wanna bother reading that, here are the main points:
1. Learn your program and its tools, from brush properties to layer styles. And I mean learn them. Make a cheatsheet that shows you exactly what each button and scale does, both in isolation and in conjunction with other buttons and scales. Refer to this as much as possible until it is intuitive. The end goal is to know exactly what to do to your brush’s settings to achieve a given effect.
2. It’s perfectly okay to use your sketches, linearts, and other forms of line in your paintings. They can help guide the form and there’s no need to make something fully “lineless”! I never make things “lineless.”
3. Study other people’s art and try to think how they could have possibly achieved the effects they did. You can learn a lot just by observing and mentally recreating the process stroke by stroke—muscle memory is a powerful tool at your disposal. This becomes easier to do once you’ve started doing item 1 above.
OKAY!
So where the heck do you even begin?
What I’m gonna do is try to make digital painting as approachable as possible for someone who’s never really done it. The main idea here is that digital painting is just like real painting. So if you’ve ever done real painting, you already kinda know what’s coming.
I’m gonna assume you know the basics of digital art: you can sketch, line those sketches using layers and opacity changes, and fill the lines with color, maybe even opting to add some shading…and you’ll get something like this:

You know, cell-shaded, or maybe the shading’s blended, but you’ve still obviously a line drawing with color put down on layers beneath the lines.
The next intuitive step is to try going “lineless”…but when you remove the lines you get this:

idk about you but I’m laughing at how stupid this looks
When I was first teaching myself to paint digitally, I didn’t really know how to deal with this. Without lines, the form of the subject vanished or became a mess like the above. Even if I was meticulous and careful about placing down the color such that without the lines layer turned on, the shapes fit together, it didn’t look quite right. There’d be gaps, I wouldn’t know how to incorporate the subject into a background, the contrast wouldn’t be high enough, or it’d just in general look too much like a screenshot from Super Mario 64.
Painting requires a different process than the above. You’ll have to let go of some of your habits and conventions. Such as staying in the lines. Such as fully relying on the lines. Like, I love my lines, I love my sketches—but in painting, they are guides for form, and are not the form itself. So let me go through how I approach a given painting:

My painting process starts with a sketch (here a boring portrait for demonstrative purposes). I make the opacity of the sketch layer something like 30%, and then throw down my base colors on a new layer underneath. I’m not being meticulous about the sketch itself, because again it’s just meant to guide my placement of color. I’m also not meticulous about my placement of the color.
We’re essentially sketching with color. Because ultimately what we want is for the color to take on the form and shapes conveyed by the sketch.
There’s a lot going into this about how to use value, how to shade, how to use color, etc. that I’m kinda skipping over because it takes a lot of time to explain…but there are hundreds of tutorials out there on those topics so please, google around! I found some helpful tuts that way when I was starting out.
Something I find v useful is to keep selecting colors that already exist in your image for shading and hue adjustment. This is why I start with really blendy, low-opacity brushes when throwing down color on top of the background. I can then select colors within there that are a mix of the two.
For instance, I’ll select the color of the lines here:

…and use that to shade:

And maybe I’ll select one of the darker shades around his eye, but not the darkest, to make the shading a smoother gradient…and so on.
What I do in general at this point is go over the shapes and lines of the sketch. Such that I can turn off the sketch layer and see this:

I’m replacing the lines with shading and value. I’ll continue to do this as I keep adding color.

This is all super loose. I am not dedicated to any particular stroke. I just want the colors and shading and light source to be right. I’ll use overlay layers to boost contrast or add a hue.
Here are other examples where I used this process:


I am constantly changing brushes and brush settings as I paint. It really depends on what effect I want where. I am also constantly selecting new colors and applying or blending those in. I don’t believe in having some uniformly applied base color and then shading with only one or two…that’s what I’d do if I was cell-shading like the first drawing I showed you here, but painting should be about messing with color and opacity and blending to make millions of hues!
Good rule of thumb: Hard, opaque brushes for applying color. Soft, dilute brushes for blending colors. Sometimes hard, dilute brushes can make some cool blending effects! I personally prefer harder edges on my shading so that’s a brush I use often.
This is getting a bit long so I’m gonna split it up into multiple parts, but really what I want you to get from this is:
1. learn the tools at your disposal until they are intuitive
2. sketch and line are guides for form, not the form itself
3. rather, hue and value will produce the form
And of course, practice makes perfect!!! Every drawing you make, every painting you make, will bring you one step closer to the artist you want to be, and thus every drawing and every painting, no matter what, is a success.


How to avoid White Room Syndrome
by Writerthreads on Instagram
A common problem writers face is "white room syndrome"—when scenes feel like they’re happening in an empty white room. To avoid this, it's important to describe settings in a way that makes them feel real and alive, without overloading readers with too much detail. Here are a few tips below to help!
Focus on a few key details
You don’t need to describe everything in the scene—just pick a couple of specific, memorable details to bring the setting to life. Maybe it’s the creaky floorboards in an old house, the musty smell of a forgotten attic, or the soft hum of a refrigerator in a small kitchen. These little details help anchor the scene and give readers something to picture, without dragging the action with heaps of descriptions.
Engage the senses
Instead of just focusing on what characters can see, try to incorporate all five senses—what do they hear, smell, feel, or even taste? Describe the smell of fresh bread from a nearby bakery, or the damp chill of a foggy morning. This adds a lot of depth and make the location feel more real and imaginable.
Mix descriptions with actions
Have characters interact with the environment. How do your characters move through the space? Are they brushing their hands over a dusty bookshelf, shuffling through fallen leaves, or squeezing through a crowded subway car? Instead of dumping a paragraph of description, mix it in with the action or dialogue.
Use the setting to reflect a mood or theme
Sometimes, the setting can do more than just provide a backdrop—it can reinforce the mood of a scene or even reflect a theme in the story. A stormy night might enhance tension, while a warm, sunny day might highlight a moment of peace. The environment can add an extra layer to what’s happening symbolically.
Here's an example of writing a description that hopefully feels alive and realistic, without dragging the action:
The bookstore was tucked between two brick buildings, its faded sign creaking with every gust of wind. Inside, the air was thick with the scent of worn paper and dust, mingling with the faint aroma of freshly brewed coffee from a corner café down the street. The wooden floorboards groaned as Ella wandered between the shelves, her fingertips brushing the spines of forgotten novels. Somewhere in the back, the soft sound of jazz crackled from an ancient radio.
Hope these tips help in your writing!


Well it being black history month is reminding me how I wanted to doodle something like this down for a while. Since it’s been a lil detail I always take notice of in drawings. These are very simple depictions but I hope it’s enough to give the general idea! Feel free to reblog
Writing advice from my uni teachers:
If your dialog feels flat, rewrite the scene pretending the characters cannot at any cost say exactly what they mean. No one says “I’m mad” but they can say it in 100 other ways.
Wrote a chapter but you dislike it? Rewrite it again from memory. That way you’re only remembering the main parts and can fill in extra details. My teacher who was a playwright literally writes every single script twice because of this.
Don’t overuse metaphors, or they lose their potency. Limit yourself.
Before you write your novel, write a page of anything from your characters POV so you can get their voice right. Do this for every main character introduced.
What would your advice for just-starting-out young authors be?
I love new writers! I’ve never known a better way to escape my reality and live a thousand different lives.
I started writing when I was young, maybe 12 or 13 years old. I am now 25, and very much consider myself to be a child, but still, in my 10+ years of personal writing and classes, here are some of the best tips I can give anyone who is new to writing, regardless of age.
Read. Read. Read. Then read some more. The easiest and fastest way to learn how to write is by reading and studying how other people have written their stories. Study their balance of dialogue vs description vs action. Study the words they use and what they’re choosing to describe. Study the scenes that make you feel something, or pull you to the story even more, and dissect it until you understand how to do it.
Daydream. At night, in the morning, before and after school, during school, during work. When people are trying to talk to you, just daydream. Image worlds with populated moons. Imagine worlds with multiple human-like species all living in the same area. Image a boy who goes home and cries to his adoptive family parents, and girls who practices knife throwing every night to prepare for the apocalypse that no one sees coming. Dream of everything and anything because that’s how you keep and improve your creativity. Eventually you may even write something with it.
Write for yourself. Always start by writing what you enjoy, and love your characters and your stories. Everything about your first draft should be because you love the story, not what other people like. You will never please everyone, so start with yourself, and build a community with the ones who love your story as much as you do.
Do it on your own timeline. If you want to write a book in a month, edit the next and publish right after, do it. If you want to write the first five chapters of 8 books without finishing, do it. If, like me, you want to write your first novel at 18 years old, and 7 years later still not feel ready to publish, that’s ok! You are not falling behind anyone else, you are exactly where you should be on your own path.
Practice. Your writing will improve with practice, that’s how it works, it’s how it always works. No way to skip right to publishing a first draft and becoming famous for it. Practice and just keep writing, you will improve.
Challenge yourself. While you may love fantasy or romance, or maybe all your story ideas are too big for only one book and they all end up being series’, you need to try new things. Write a mystery short story. Write poetry on how you feel. Write one page on how you could survive a zombie apocalypse as long as you have your coffee in the morning, it doesn’t matter, just try new things. Trying new things is how I wrote this haiku: Take a deep inhale, Breathe fresh air into my lungs, I savorfreedom. Is it the greatest haiku ever? No, but it makes me happy, and reminds me that I can write, good or bad, and still be proud of myself.
Keep all your projects. Good or bad. Look back on them years later and think, yeah that was terrible, at least I’m better now. Or maybe think, this wasn’t as bad as I thought it was. It’s a progressive journey. You can take your time. DONT EVER SHAME YOUR YOUNGER SELF FOR THEIR WORK. THEY TRIED THEIR HARDEST AND WROTE AS BEST THEY COULD. WE ARE PROUD OF OURSELVES, NOT EMBARRASSED OR SHAMED. Whether the work is from years ago or days go. Be kind to yourself, no one else owes you that.
Compare. Compare to popular novels, compare to your friends stories or to people online. Compare and see if your character are developed enough, or if your story makes sense, or if it’s relatable. When comparing however, keep in mind that your written style will be different than all others writers. Your first novel will not be the same as an author’s 10th book that just went viral on TikTok. It takes practice and time. Compare for style, technique, structure and plot. Not for popularity, worth, importance, and don’t feel down thinking that someone writing at a higher grade level makes them better, it doesn’t.
Share your work. If you are embarrassed, use a pen name. That’s perfectly fine. Put your work out there and get feedback. Having one person saying your story is (negative criticism here) is going to happen, don’t freak out. It doesn’t mean your story is flawed and should be tossed. If most people are saying that, then maybe it’s time to revisit the story and plot. Getting feedback from people reading your story is important, you want to ask specific questions so you don’t get generic answers. Get real reviews from real people, the mean voice in your head doesn’t get a say.
Learn the difference between perfect and done. I know, I know. Perfectionists around the world just scoffed and thought ‘I would if I could’. Here’s the thing, it’ll never be perfect. A word won’t be right, you can’t find the right way to convey an emotion, your choice of vocabulary isn’t up to your standards, I get it. You want your work to be absolute perfection so that everyone loves it and no one can say a bad thing about it, but it doesn’t work that way. Instead make it to ‘complete’, then nitpick some details, then it’s done. Done is good, it’s where you want to be.
Self-publishing? Pay for a professional editor and a graphic designer. It makes a difference, I promise.
There’s lots of others, but I would say as a writer-starter-pack, these should get you started, then you will learn lessons all on your own, or find them as you’re writing later on. Truly, just have fun, and the rest will come with time.
Happy Writing!
Willow

So you might be saying: Lion why a guide on drawing black people? Well young blood it’s because a lot of people cant…seem…to draw…black people..Amazing I know.

Racist (caricatures) portrayals of black people have been around forever, and to this day people can’t seem to draw black people like they are human. If your artwork resembles any of the above even remotely your artwork is racist and offensive. If you try to excuse that as a stylistic choice you’re not only a terrible artist, but racist too!!! Congrats.

Whitewashing is also a problem. A lot of people refuse to draw black features on canonly black characters. While this example isn’t colored, lightening the skin-tone of a character is also considered whitewashing. So lets start with features!

Now all black people have different noses thats a no-brainer, but black noses tend to have flatter bridges, and wider nostrils. Please stay from triangular anime noses and small button noses. Your drawings should not depict black people with abnormally large noses. (Especially if you do not draw other characters this way)

If you feel like the way you draw lips on black characters is offensive or resembles a caricature,it probably does and you should change it. ABSOLUTELY AVOID PLACING LIPS AT THE BOTTOM OF THE FACE.

Hair is so diverse! Please get used to drawing braids, locs,kinks and coils! If you can learn to draw ringlets and long waves you can learn how to draw black hairstyles.

Add clips! Learn how to draw baby-hairs and never be afraid to add color Pinterest and Google are free my dudes! Also try using square brushes for blocking in coils.
OK THAT’S ALL YOU GUYS

I really, and I mean, really LOVE the way you draw robots! If's so mechanical and just eye-pleasing honestly.
I want to try drawing robots myself as you've inspired me! Do you have any tips on doing so?

Sorry for taking so long to respond, I’m really glad I inspired you! these are a few things I use in nearly every robot design/drawing
I think it’s super important to know how your robot moves and these common joints are a great way to start!
And remember these are just suggestions go wild with your robot designs! They can be anything and do anything you can think of :D
-
 cosmic-sorcerer reblogged this · 1 week ago
 -
cosmic-sorcerer liked this · 1 week ago
-
 i--started-a-joke liked this · 1 week ago
 -
 iggity liked this · 1 week ago
 -
iggity reblogged this · 1 week ago
-
 bananapuddling liked this · 1 week ago
 -
 bb-bugspot liked this · 1 week ago
 -
 levan-shprota liked this · 1 week ago
 -
 itsallgoingtopot reblogged this · 1 week ago
 -
 mof-rot reblogged this · 1 week ago
 -
 godsfatassspheal reblogged this · 1 week ago
 -
godsfatassspheal liked this · 1 week ago
-
 maeglinhiei reblogged this · 1 week ago
 -
 tulikettuun liked this · 1 week ago
 -
 mrstarkitsmellslikeanewcarinhere reblogged this · 1 week ago
 -
 phantomwriteroffelings reblogged this · 1 week ago
 -
 tnsmeta reblogged this · 1 week ago
 -
tnsmeta liked this · 1 week ago
-
 freeonthesea reblogged this · 2 weeks ago
 -
 wordcubed liked this · 2 weeks ago
 -
 vampriccoffin liked this · 2 weeks ago
 -
 ludciden liked this · 2 weeks ago
 -
 robbed-ghost reblogged this · 2 weeks ago
 -
robbed-ghost liked this · 2 weeks ago
-
 lemon-limelight reblogged this · 2 weeks ago
 -
 scoobular liked this · 2 weeks ago
 -
 stennyandbaddecisions reblogged this · 2 weeks ago
 -
stennyandbaddecisions liked this · 2 weeks ago
-
 synthmusic91 liked this · 2 weeks ago
 -
 okaart reblogged this · 2 weeks ago
 -
 yurimom liked this · 2 weeks ago
 -
 creativeandwittyname reblogged this · 2 weeks ago
 -
 stgurney reblogged this · 2 weeks ago
 -
 berrytual liked this · 2 weeks ago
 -
 autismleavesrevisited liked this · 2 weeks ago
 -
 maneofgold liked this · 2 weeks ago
 -
 wonderwyrm liked this · 2 weeks ago
 -
 dude-thatsgay reblogged this · 2 weeks ago
 -
dude-thatsgay liked this · 2 weeks ago
-
 beloved-junkdrawer reblogged this · 2 weeks ago
 -
 softenedbyitscomfort reblogged this · 2 weeks ago
 -
softenedbyitscomfort liked this · 2 weeks ago
-
 childofeberron liked this · 2 weeks ago
 -
 ashearmstrong reblogged this · 2 weeks ago
 -
 reorenka liked this · 2 weeks ago
 -
 keyriingz liked this · 2 weeks ago
 -
 viiiiiiiiiiiiiiiien reblogged this · 2 weeks ago
 -
 roseate-science reblogged this · 2 weeks ago
 -
 mabarbi reblogged this · 2 weeks ago
 -
mabarbi liked this · 2 weeks ago
